How To Batch Add In Coppermine Photo Gallery
There are two different ways that you can upload photos to your gallery’s albums folder. First we’ll do the cpanel version and then second we will do the FTP version.
Before Upload Process
- Sign into your cpanel with your login information.
- Once in your panel, you’re going to click on “File Manager”
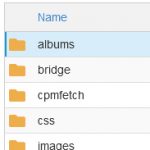
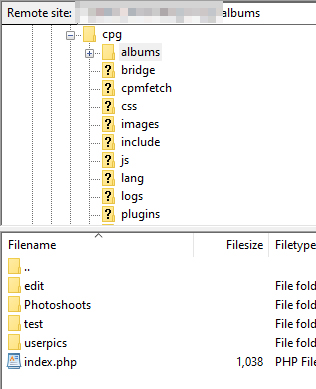
- Once in, navigate through your Gallery to your Albums folder.
- You should see a list of folders once inside titled “userpics” and “edit”, do not touch those and let them stay in there as they are not being used in this tutorial.
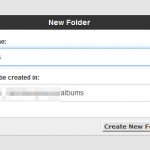
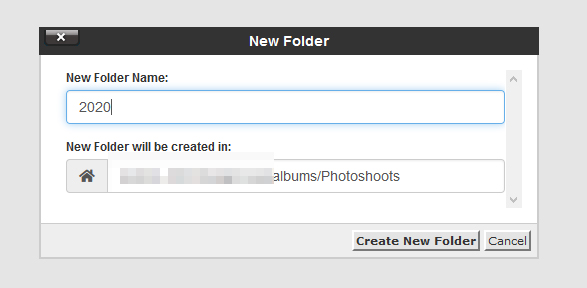
- Click on the “+ Folder” link to create a new folder. This will server as a category folder. You can make the structure of your gallery anything you desire, this is just for tutorial purposes. I have created a folder title “Photoshoots”, click okay once you have it named and it’ll appear in your list of folders.
- Now, I want to add another category into my photoshoots for year, so I’ll click on my folder and go into it in my directory then create another folder titled “2020”.
Upload Process – CPANEL
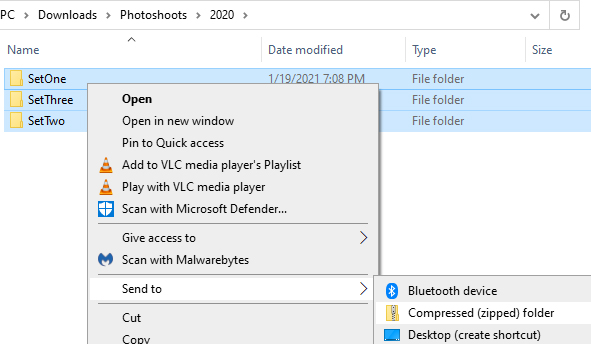
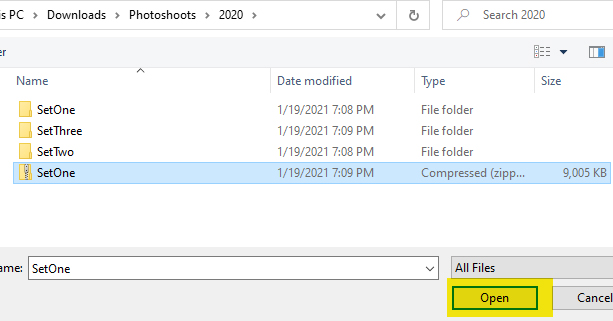
- Now, I have all of my 2020 shoots already in a folder on my computer and the files are all renamed and ready to be uploaded. So I’m going to select all of them, right click and zip on the folders I want to add to my gallery.
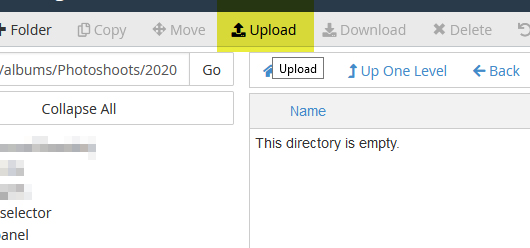
- Then I’ll go back into my CPANEL tab, double click on the year 2020 folder that I created and then click “Upload”.
- It’ll ask me what I want to upload, so I’ll navigate to where my zip is that I just created (be careful not to zip too many or it may take a long time to upload) and click to upload it.
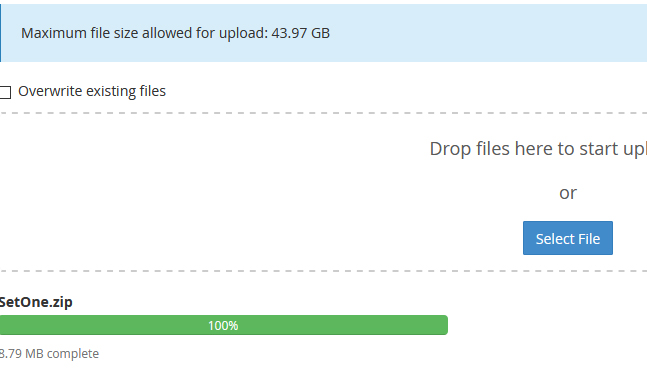
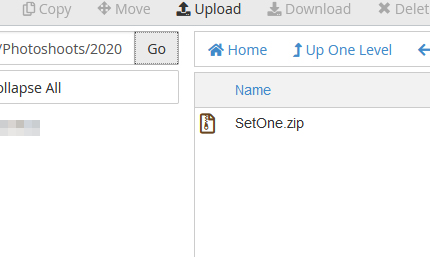
- Wait for it to upload and once it’s done, go back to the tab where you uploaded it to, click “go: to refresh the directory and your zip should then show up.
- Now you can click on the file and click “Extract” and Extract files.
- Click go again and it should refresh. You’ll see your folders and the zip you uploaded. Go ahead and delete the zip. You are now done with this version of uploading. If you chose this, please skip over the FTP upload version and go straight to Batch Adding.
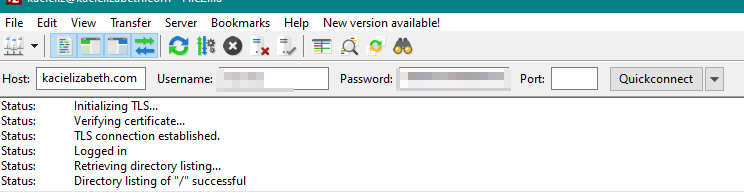
Upload Process – FTP
- For this, you will need an FTP client. Filezilla and Coreftp are two pretty good ones. Once you have an FTP client, open it up and type in your site and login details.
- After being connected, you’re going to want to navigate to your gallery albums folder.
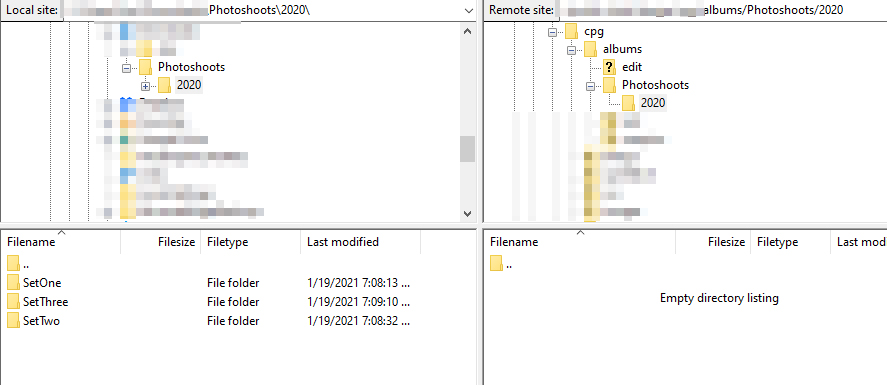
- Once there, you’ll see the folder we created in the before upload process and this is where you’ll double click that, then onto the year.
- The directory is empty! It’s time to add our folders to it. You should have a left panel in your FTP client where you can view folder structures on your computer. Find the folder that contains the content you want to upload.
- Once there, select all the folders you want to upload and drag it into the right window. You should see everything starting to upload then.
- Wait until it is done uploading everything and then you’re done! You can move onto the next step, Batch Adding.
Batch Adding Process
- Log into your coppermine photo gallery.
- Once logged in, create the albums you are batch adding to in whichever category they belong in. (if you haven’t already)
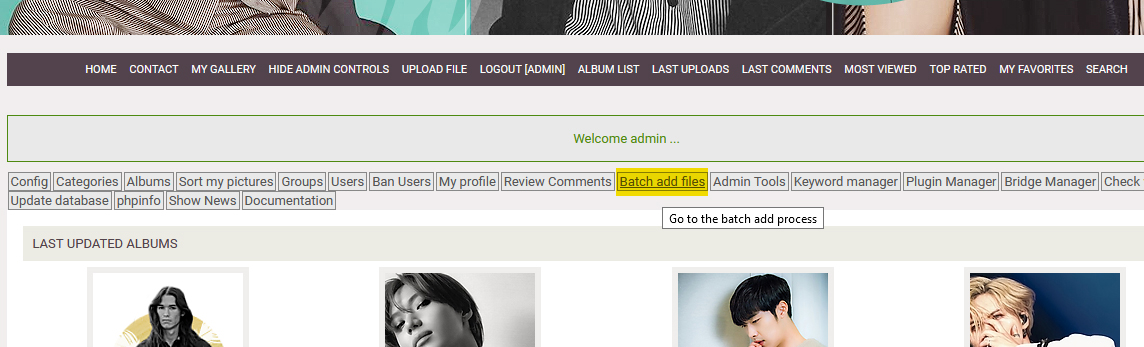
- Now click on “Batch Add Files” (every theme will look different)
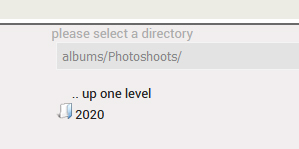
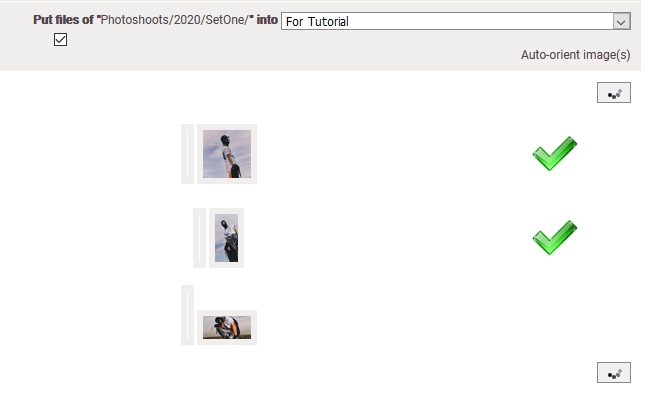
- Once there, you’ll click on the Photoshoots category folder we created, then onto 2020.
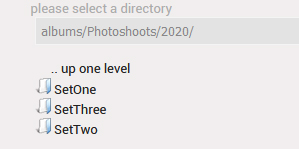
- Now you should see all of the albums that you have uploaded.
- Click on one of them.
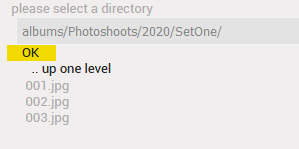
- It should show the files in the folder, click OK.
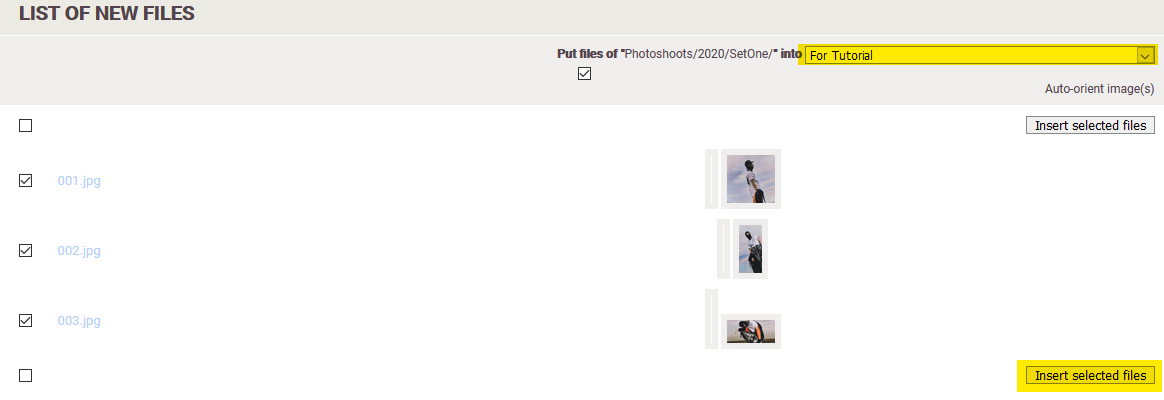
- Now select the album they go into and click Insert Selected Files.
- Wait for the batch adding process to complete, once done you can view the files.
- Now repeat the process for the rest of the albums that you uploaded.
If you found this tutorial to be helpful to you, please consider buying me a coffee on Ko-Fi.